【Spring Gateway】 架构搭建
【Spring Gateway】 架构搭建
Metadata
title: 【Spring Gateway】 架构搭建
date: 2023-02-13 22:07
tags:
  - 行动阶段/完成
  - 主题场景/组件
  - 笔记空间/KnowladgeSpace/ProgramSpace/ModuleSpace
  - 细化主题/Module/SpringGateway
categories:
  - SpringGateway
keywords:
  - SpringGateway
description: 【Spring Gateway】 架构搭建
【Spring Gateway】 架构搭建
通过上述讲解已经了解了基础概念,我们来动手搭建一个GateWay项目,来看看它到底是如何运行的
新建项目:cloud-alibaba-gateway-9006
版本对应
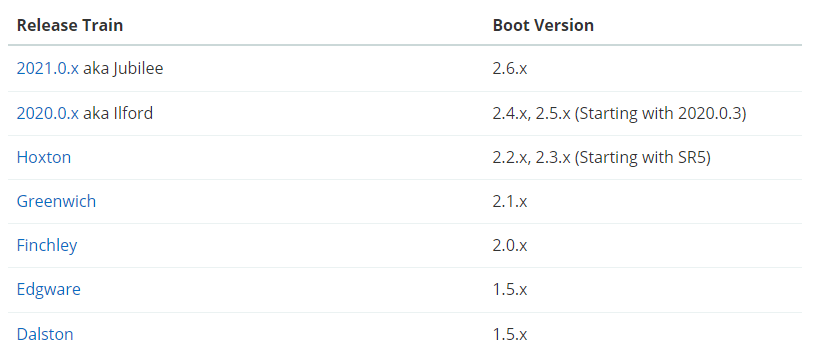
GateWay属于SprinigCloud且有web依赖,在我们导入对应依赖时,要注意版本关系,我们这里使用的版本是 2.2.x的版本,所以配合使用的Hoxton.SR5版本
在这里我们要注意的是引入GateWay一定要删除spring-boot-starter-web依赖,否则会有冲突无法启动
父类pom引用:
<spring-cloud-gateway-varsion>Hoxton.SR5</spring-cloud-gateway-varsion>

 <dependency>
    <groupId>org.springframework.cloud</groupId>
    <artifactId>spring-cloud-dependencies</artifactId>
    <version>${spring-cloud-gateway-varsion}</version>
    <type>pom</type>
    <scope>import</scope>
</dependency>
子类POM引用:
<dependencies>
    <dependency>
        <groupId>com.alibaba.cloud</groupId>
        <artifactId>spring-cloud-starter-alibaba-nacos-discovery</artifactId>
    </dependency>
    <dependency>
        <groupId>org.springframework.cloud</groupId>
        <artifactId>spring-cloud-starter-gateway</artifactId>
        <version>2.2.5.RELEASE</version>
    </dependency>
    <dependency>
        <groupId>org.projectlombok</groupId>
        <artifactId>lombok</artifactId>
    </dependency>
</dependencies>
yml配置
server:
  port: 9006
spring:
  application:
    name: cloud-gateway-service
  cloud:
    nacos:
      discovery:
        server-addr: localhost:8848
    gateway:
      discovery:
        locator:
          enabled: false #开启注册中心路由功能
      routes:  # 路由
        - id: nacos-provider #路由ID,没有固定要求,但是要保证唯一,建议配合服务名
          uri: http://localhost:9001/nacos-provider # 匹配提供服务的路由地址 lb://表示开启负载均衡
          predicates: # 断言
            - Path=/mxn/** # 断言,路径相匹配进行路由
我们在之前的 cloud-alibaba-nacos-9001 项目中添加下面测试代码
@RestController
@RequestMapping("/mxn")
public class DemoController {

    @Value("${server.port}")
    private String serverPort;

    @GetMapping(value = "/hello")
    public String hello(){
        return "hello world ,my port is :"+serverPort;
    }

 }
启动 Nacos、cloud-alibaba-nacos-9001、cloud-alibaba-gateway-9006通过gateway网关去访问9001的mxn/order看看。
首先我们在Nacos中看到我们服务是注册到Nacos中了
在上述方法中我们是通过YML去完成的配置,GateWay还提供了另外一种配置方式,就是通过代码的方式进行配置,@Bean 注入一个 RouteLocator
import org.springframework.cloud.gateway.route.RouteLocator;
import org.springframework.cloud.gateway.route.builder.RouteLocatorBuilder;
import org.springframework.context.annotation.Bean;
import org.springframework.context.annotation.Configuration;

@Configuration
public class GateWayConfig {

      /*
    配置了一个id为path_mxn的路由规则
    当访问地址http://localhost:9999/mxn/**
    就会转发到http://localhost:9001/nacos-provider/mxn/任何地址
     */
    @Bean
    public RouteLocator gateWayConfigInfo(RouteLocatorBuilder routeLocatorBuilder){
        // 构建多个路由routes
        RouteLocatorBuilder.Builder routes = routeLocatorBuilder.routes();
        // 具体路由地址
        routes.route("path_mxn",r -> r.path("/mxn/**").uri("http://localhost:9001/nacos-provider")).build();
        // 返回所有路由规则
        return routes.build();
    }
}
我们可以将路由注释掉之后看一下,重启9006服务,访问地址http://localhost:9006/mxn/hello 就可以转发到9001中具体的接口中
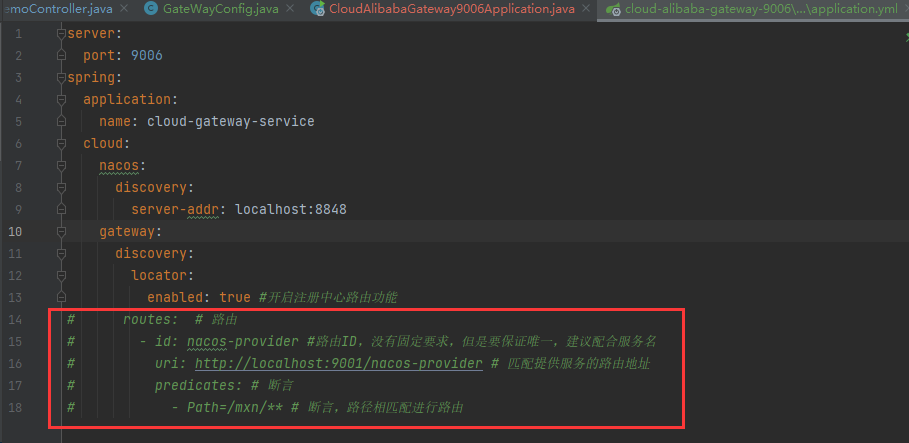
这里并不推荐,使用代码的方式来进行配置gateWay,大家有个了解就可以,因为代码的配置维护的成本比较高,而且对于一些需要修改的项,需要改代码才可以完成,这样不利于维护和拓展,所以还是推荐大家使用yml进行配置。
GateWay负载均衡
在上述的讲解中,我们已经掌握了 GateWay 的一些基本配置和两种使用方式,下面我们就来讲解一下 GateWay 如何实现负载均衡
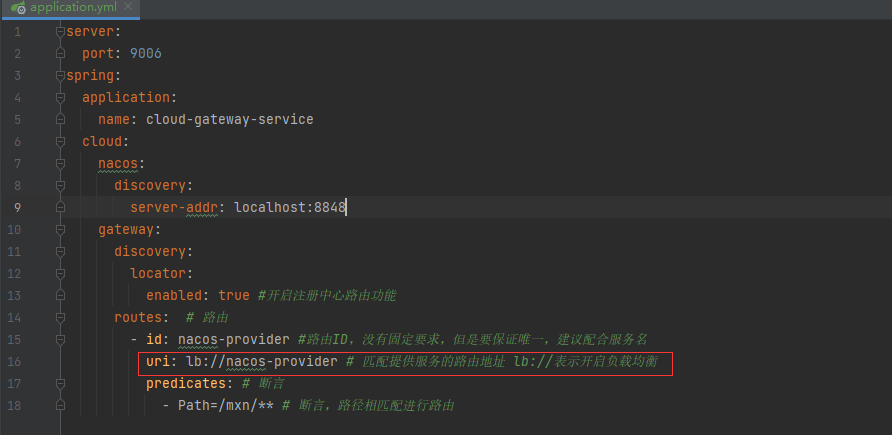
我们只需要在9006中添加lb://nacos-provider就可以显示负载均衡。
 wechat
 alipay